| 
| 
|
|
17 Comments
If we are taking pictures indoors with a beautiful scene outside the window, how do we achieve a perfect exposure to compliment both elements? Last weekend I was at a house warming party in New Jersey. In late afternoon I notice that the warm sunshine was pouring into the dining room. The leaves outside the window are just starting to change color. It was beautiful. I wanted to take a picture of the proud hostess in this setting. Below are the steps I took,
 STEP 4: Minor adjustment I powered down the flash light a little bit with FEC adjustment (Flash Exposure Compensation). Notice the darker ceiling compared to the picture in STEP 3. The overall look is more natural, and the artificial light blends with the ambient light.  STEP 5: Adding the hostess
The afternoon sun lighted the right side of the lady nicely. The bounced flash light filled in the shadows. I turned down the power of the flash a little further, so that the rest of the scene did not overpower the hostess. Technical details: Focal Length: 28mm Aperture: F4 ISO: 800 Shutter Speed: 1/320 Flash Type: External ETTL FEC: -2/3 Gel: 1/4 CTO "Do I need to upgrade my equipment to take better pictures?", I get asked this questions many times. Maybe. But most of the times, I don't think the equipment is the deciding factor. I owned my Canon 5D Mark ii before I became a professional. At that time, I had one of the best cameras ever made. But my pictures never stood out. "Your camera is only as good as you are as a photographer." This statement could be hard to swallow, but it can't be more true. In my opinion, we don't necessarily need better equipment to take better pictures. We may need to better train our "photographer's eye; to improve our technique, and lastly, we need to find the equipment that 'speaks' to us. For example, I love my F1.8 85mm lens. It is a prime lens for portraits: not a professional lens, and only costs about $350. Do I need to spend over $1,000 on a professional portrait lens for my photography session? Do I need a wide angle lens for landscapes? Do I need a 1:1 Macro lens for macro photography? Those could help. But again, they are not the deciding factor. The three pictures below are all taken by my F1.8 85mm lens. Portrait. Landscape. Macro photography. Most of the time, we don't need to spend more money to take better pictures. Rather, study your pictures for areas for improvement; read a good photography book; and try to master your existing equipment. And you may be surprised at what even a point and shoot can do for you.  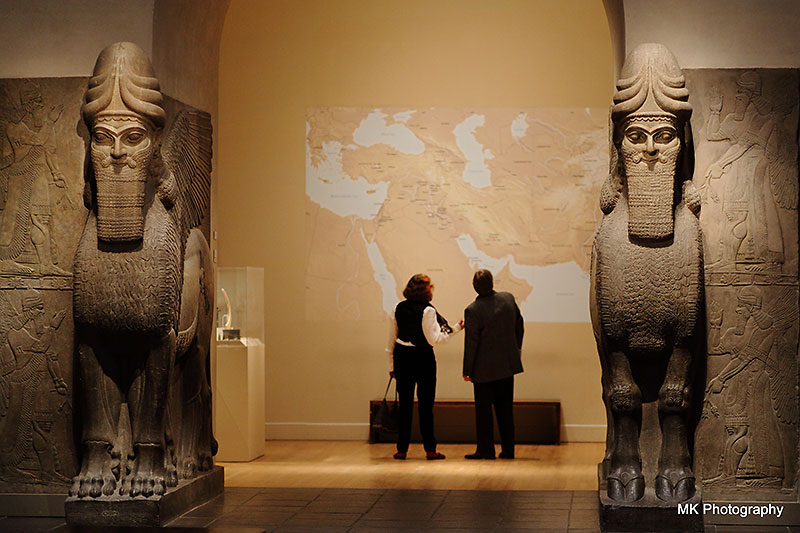  Does this sound familiar to you? You are at a beautiful place and take lots of pictures. But surprisingly, none of the pictures seems to recreate the "awe-inducing scene". Next time, try to add a little human interest in your scene. I was at Metropolitan Museum the other day and came across a temporary exhibit of a captivating masterpiece of ancient bronze sculpture--The Boxer at Rest. I was looking for a good angle for pictures. When facing the back of the sculpture, I noticed something fascinating: the expressions on viewers' faces when they look at the boxer's face.   In the above two pictures, the boxer's head is out of focus. Is it not the subject anymore? It still is. The subject is now the Boxer and its viewer. Compare with the below picture of the boxer alone. Which picture(s) do you like better? Does the human interest in the scene make you more curious to see the boxer's face?  Now what kind of expression are you having when gazing into his eyes?  Read more about "The Boxer at Rest" at
http://www.metmuseum.org/about-the-museum/now-at-the-met/features/2013/the-boxer Have you heard of Manhattanhenge? Manhattanhenge is a circumstance which occurs twice a year, during which the setting sun aligns with the east–west streets of the main street grid in the borough of Manhattan in New York City. In other words, the sun sets in the middle of the streets on these 4 days. (http://en.wikipedia.org/wiki/Manhattanhenge) As you have guessed, this circumstance is very popular among photographers and tourists, but has proven quite difficult to capture (at least in my case). There are several reasons, 1. Location. For best effect, position yourself as far east in Manhattan as possible. But ensure that when you look west across the avenues you can still see New Jersey. Look for wide streets with no obstruction. 2. Location. The picture would be more special with NYC landmarks. There are only two best candidates: The Empire State Building and The Chrysler Building. 3. Location. Since the sun will set in the middle of the streets, you have to be in the middle of the crossroad. (!) This means you have to quickly walk to the center of the streets, take the picture, and return to the sidewalk before the light changes. Then imagine a LOT of people are trying to do the same thing at the same places at the same time! Now You know why I wasn't able to do capture Manhattanhenge in its perfect form. But still, during the a few days around Manhattanhenge, Big Apple's street corridors bath in s tunning orangey-pink light, as the sun descended in the sky. What can I do with it?     There are two basic criterion for professional photographs: perfect focus and dead-on exposure. How to achieve them?
Exposure is a lengthy topic, and we will save it for another day. Let's focus on "Focus" today. There are generally two types of subjects. Stationary Vs. In motion. On your DSLR (Digital Single Lens Reflex), there are several modes designed to realize proper focus for different subjects. I am a Canon user, and will take my 5D Mark ii as an example. There are three focusing modes on a Canon 5D mark ii: ONE SHOT, AL SERVO, AL FOCUS. ONE SHOT is used for stationary objects: portraits and scenery (waterfalls too, even if the water is moving) -- subjects that can hold still. ONE SHOT means that the lens only focus once--when you press the shutter half way down. There is usually an indicating beep or/and a focus point lighting up in your view finder when the focus is achieved. The benefit of ONE SHOT focusing mode is that it allows you to RE-POSITION and RE-FRAME your shot, if you CONTINUE to hold the shutter HALF WAY DOWN, until you re-frame the shot and push the shutter all the way down. When is ONE SHOT good for? Suppose you are taking a picture for your friend, and are using your center focusing point. First, you focus on your friend's eyes. (Quiz: Which part of the face should you focus on when taking someone's picture? Hint: Not the nose!) Now the eyes are in focus, but the top third of the picture is the white wall behind your friend. In this case, press the shutter HALF WAY DOWN at your friend's eyes, and KEEP pushing the shutter HALF the way down when you re-frame, UNTIL you include less of the wall and more of your friend in the frame, and then push the shutter ALL THE WAY down. (It sounds lengthy, but it only takes a second.) Ta-da! Now you have a much better image and a much happier friend. What if your camera only has symbols for different modes, like a mountain, a person standing and a person skiing? Use the mountain symbol in shooting scenery, and the person standing symbol when taking a portrait. They should be variations of the ONE SHOT mode described here. The difference between the two: the mountain symbol probably allows a greater Depth Of Field (things are clear from near to far), and the person standing symbol means a shallower depth of field (the focusing point is sharp and the background is blurry. ) Key notes: Try to avoid camera shake when re-framing, and LOTS OF PRACTICE. Result: Be prepared for a lot of compliments on your improved photography skills! Happy shooting!  I am not always a photographer.
I worked in financial sector for most of my career, and became a housewife before my son was born. After being very occupied domestically for two years, I thought of the things to make me (even) happier, and made a "To-do list". It was a silly list consisting of things like, "to wear very high heels again", or "to eat a four course meal without interruptions". It also included "to learn to take good photos". Looking back on my list, the "high heels" and the "meal without interruptions" are still a dream to me. But "to take good photos" is no longer a dream. And I am really a lot happier (and even busier). I was a Toastmaster. If you knew Toastmasters (a public speaking club), you would know the project 1 is to "Break the ice"--to let others know more about you. My Project 1 topic was "Kodak Family and Camera Gal". My dad worked for Kodak. He later opened his own commercial labs. My father and mother and me are all big photo fans--when they come to visit, my husband's biggest nightmare is to hear the shutters WHEREVER he goes. Poor guy. I have always wanted to learn in NYIP (New York Institute of Photography). I read their translated course materials when I was in high school and became a fan. Moving to NYC gave me the chance to actually take the course. The course helped me tremendously. A hobby and a course do not make a dream. As I take more and more photos, I began to see the world in a different light. And I realized this is something that I would like to pursue. It was not easy. Before I didn't understand why mothers with their own businesses are so driven. Now I understand. It is hard to make the time when you are juggling so many things at once. But if you love it and want to do it right, you will not give up easily. Just as the late great photographer Monte Zucker said, "It is wonderful because it is hard. If it is easy, then everyone will do it. But if it is hard, and you still do it, it is wonderful." So here I am, walking towards my dream, one small step at a time. I also encourage you to step out of your routine, take a risk and follow your dream. It is wonderful. |